


Razer Synapse is a cutting-edge configuration software designed to enhance the functionality and personalization of Razer’s gaming peripherals.
Since its initial release in 2011, Synapse has evolved significantly, transitioning from a basic driver utility to a comprehensive ecosystem that allows users to customize lighting, key bindings, macros, and performance settings across multiple devices.
Over the years, Razer has consistently updated the software, adding cloud-based profiles, advanced RGB controls, and seamless integration with other Razer products, making it an essential tool for gamers and tech enthusiasts alike.
This review explores its features, usability, and overall impact on the gaming experience.

If you own a Razer device, chances are you’ve heard of Razer Synapse. But what exactly is it? In simple terms, Razer Synapse is a free software platform designed to help users unlock the full potential of their Razer gaming peripherals—keyboards, mice, headsets, and more.
It’s like a control center that lets you personalize settings, create custom commands, and sync lighting effects across your devices, all in one place.
So, what exactly can you do with Synapse? Let’s break it down:
Device Configuration
This is the core function. Synapse lets you adjust settings for individual devices. For mice, you can change DPI sensitivity, button assignments, and scroll wheel speed.
For keyboards, you can remap keys, create macros (sequences of keystrokes), and adjust actuation force on compatible models. Headsets can have their EQ settings tweaked, microphone sensitivity adjusted, and surround sound simulated.
Chroma RGB Lighting
Razer’s Chroma lighting system is a big part of their product identity, and Synapse is where you control it all.
You can choose from a wide range of pre-set lighting effects, or dive into the Chroma Studio to create your own intricate patterns and animations. This allows for a truly personalized and visually stunning gaming setup.
Macro Creation
Macros are incredibly useful for automating repetitive tasks in games or even everyday applications.
Synapse makes it relatively easy to record and assign macros to specific keys or mouse buttons. This can be a huge time-saver and give you a competitive edge in gaming.
Profile Management
Synapse allows you to create and save different profiles for various games or applications. This means you can quickly switch between customized settings without having to manually adjust everything each time.
You can even link profiles to specific games, so Synapse automatically loads the correct settings when you launch them.
Cloud Sync
Your profiles and settings can be stored in the cloud, so you can access them from any computer with Synapse installed.
This is particularly useful for gamers who use multiple machines or travel frequently.
Key Features and Highlights
- Centralized control for all Razer devices.
- Customize mouse DPI and button assignments.
- Remap keyboard keys and create macros.
- Adjust headset EQ and microphone settings.
- Extensive Chroma RGB lighting customization.
- Create and manage device profiles.
- Cloud syncing for settings and profiles.
- Automate tasks with powerful macros.
- Fine-tune device performance.
- Personalize your gaming experience.
How to Download & Install
Razer Synapse is a powerful tool for customizing your Razer peripherals, and getting it up and running is a straightforward process. Here’s a step-by-step guide to downloading and installing it on your Windows machine:
1. Click on the above Download Button -at the top of this page- to download latest version of Razer Synapse.
2. Locate the Installer File: Once the download is complete, go to your “Downloads” folder or the location where the file was saved.
3. Run the Installer: Double-click the installer file (usually named something like “RazerSynapseInstaller_Vxxxx.exe”) to begin the installation process.
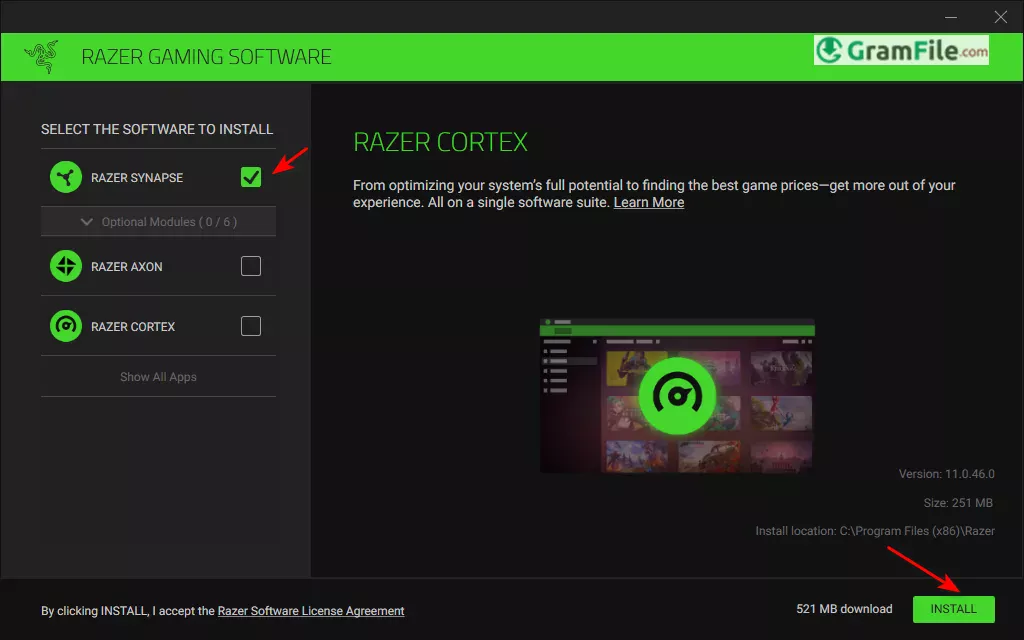
4. Follow the On-Screen Instructions: The installer will download additional required files before starting the installation process.
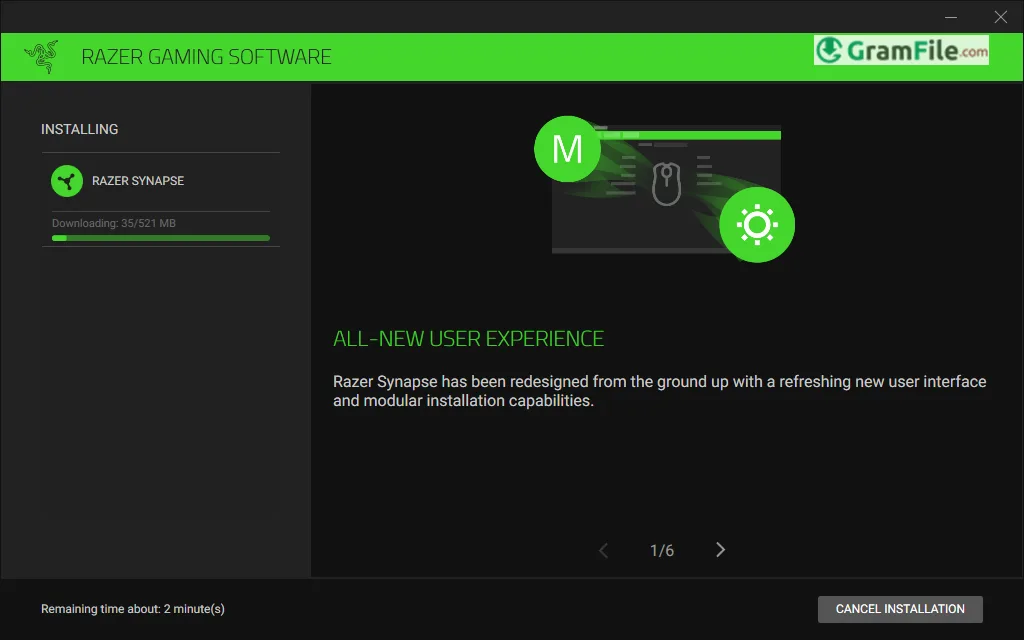
5. Complete the Installation: Click “Install” and wait for the process to finish. This may take a few minutes.
6. Launch Razer Synapse: Once installed, you can launch Razer Synapse from your desktop or Start menu.
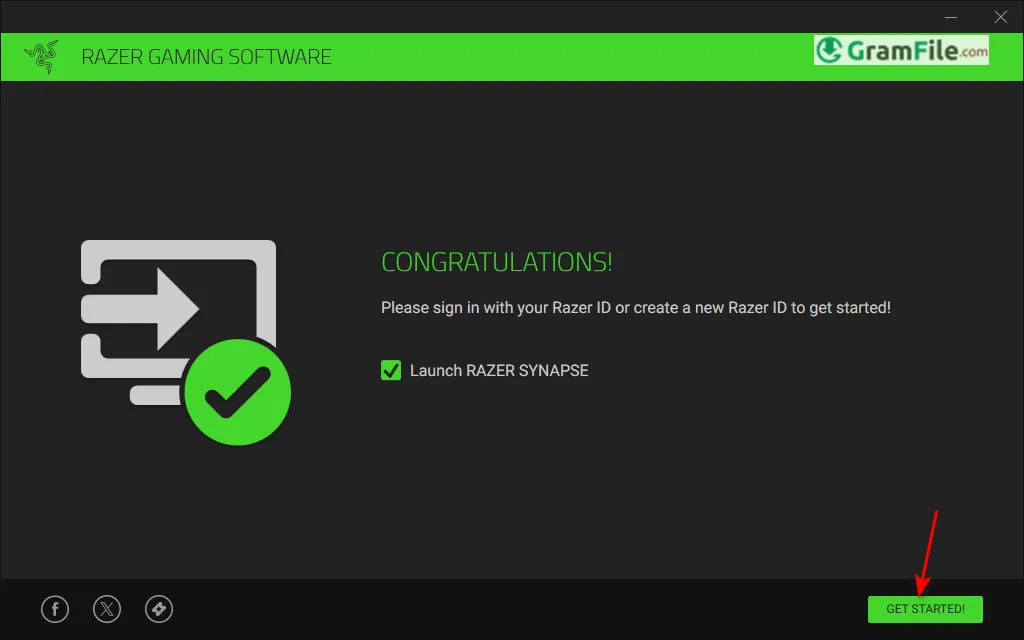
7. Sign In or Create an Account: Log in with your Razer account or create a new one to access cloud features and save your settings.
8. Connect Your Razer Devices: Plug in your Razer peripherals, and Synapse will automatically detect them, allowing you to start customizing right away.
That’s it! You’re now ready to unlock the full potential of your Razer devices with Razer Synapse. Enjoy!


